How to Clean a Keurig Machine
How to Clean a Keurig Machine

We have had our Keurig machine for over a year now and other than cleaning the inside of our tank when we refill it we haven’t CLEANED our whole Keurig machine. I wondered How to clean a Keurig Machine thoroughly to make sure what we were drinking was clean filtered water. I couldn’t see what was inside the machine in that reservoir to know if it was clean water or not?
So here are 7 easy steps on How to Clean a Keurig Machine.
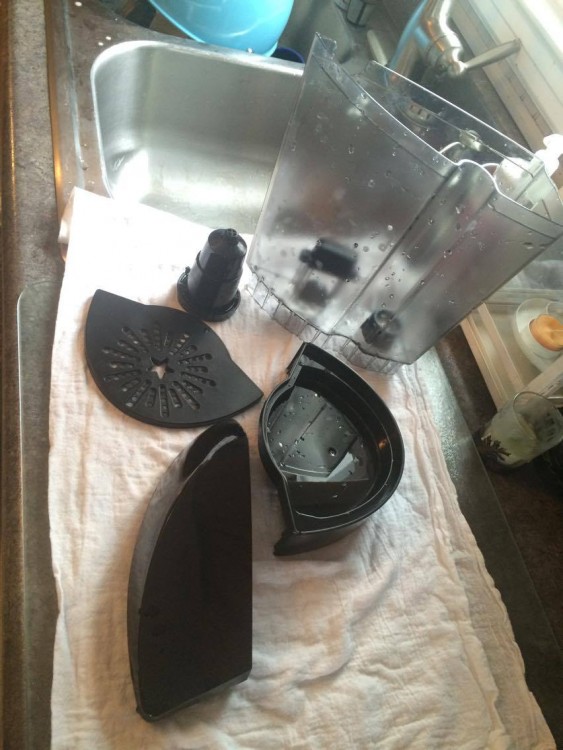
- Unplug your Keurig machine and disassemble the whole thing. Removing the water reservoir and base where your cup sits. Also remove the K-Cup holder. Remove the K-Cup holder by grabbing the top of the holder with one hand then using your other hand, push up on the bottom of the K-cup assembly from below. The assembly should eventually come out, just be very careful because there are two sharp needles at the top!
- Wash all the items that you just took apart above. Everything but the water reservoir and lid is dishwasher safe on the top rack! Or you can hand wash them, just remember about the SHARP needle if you are hand washing the K-cup holder! Hand wash the water reservoir and lid with hot water, mild detergent and a soft cloth. Nothing to abrasive! Then dry all the items well or if you have time just let them air dry for several hours!

- Clean the exit needles really well. I have found using a paper clip is best. Just insert a paper clip into each one of the two needles working out anything that could get trapped, especially if you are switching pods out like coffee then tea to hot cocoa! You can’t poke through the needle to the other side!
- While everything else is drying you can now wipe down the rest of the machine with damp soft cloth or sponge! if needed you can use a little it of mild soap.
- Put everything back together once every item has been cleaned and dried! Align the arrows on the top and bottom of the K-Cup with those marked on the machine. The two front tabs on the holder should should be on the bottom and the single tap on the front should be at the top. Push on the top rim to snap it back into place. Re-insert the drip tray by sliding it back into place until it clicks.
- Finally we are going to descale the whole inside of the Keurig machine. There are 3 steps to this.

- A.) Fill water reservoir with 10 oz of undiluted white vinegar and place a mug underneath to catch the vinegar just like you would a cup of coffee. Just make sure no pods are in the machine while doing this Vinegar rinse! Lower the handle and press brew! Discard the hot vinegar.
- B.) We will do a second rinse but this time allow the vinegar to sit for up to 4 hours to really descale the inside of the machine! Then hit brew and discard the remaining hot vinegar. If your Keurig is asking for water you may need to add up to 48 oz of vinegar. Then just brew til empty!.
- C.) Final step to descaling is the final rinse! Fill the water reservoir with about 48 oz of fresh filtered water. Then brew the water allowing it to rinse out the remaining vinegar and discard of the hot water. This may need to be done up to three times to get all the vinegar out!

Cleaning your Keurig machine needs to be done between 3-6 months to ensure it will work and taste properly!
For more tips on clean check out these


February 2, 2016 @ 2:01 am
I needed to do this. I now have cleaned my Keurig.
February 2, 2016 @ 2:51 pm
I also wondered if you could run vinegar through your Keurig. I do it for our regular coffee pot.
February 4, 2016 @ 10:44 pm
I totally need to clean my Keurig! Thanks for showing a simple way to do it!
March 5, 2016 @ 3:27 am
Add me to the list of never been done! This might be why mine is making noise and not producing the same amount of water each time.
May 2, 2016 @ 1:14 am
wISH I would have seen this how to article first. Our Keurig was super nasty tasting .. the end result.. so I tossed it.